Collection trees create a logical and easy-to-navigate structure for your content. A Collection Tree starts with a top-level container (either a Collection or Library Organizer) and then is made up of sub-Collections that contain assets. By default the same permissions are assigned to all Sub-Collections, providing a natural navigation aid.
You can have as many sub-collections in a tree as is necessary to ensure that your assets are well-organized.
We strongly recommend assigning permissions to the top level item (Organizer or Collection) and then adding sub-Collections that inherit those permissions.
The first step in building a Collection Tree is to create a top-level Library Organizer and assign Group permissions to that Organizer. The next step is to add sub-Collections. Read on to see the two ways to add sub-Collections to a parent container.
Create a Sub-collection
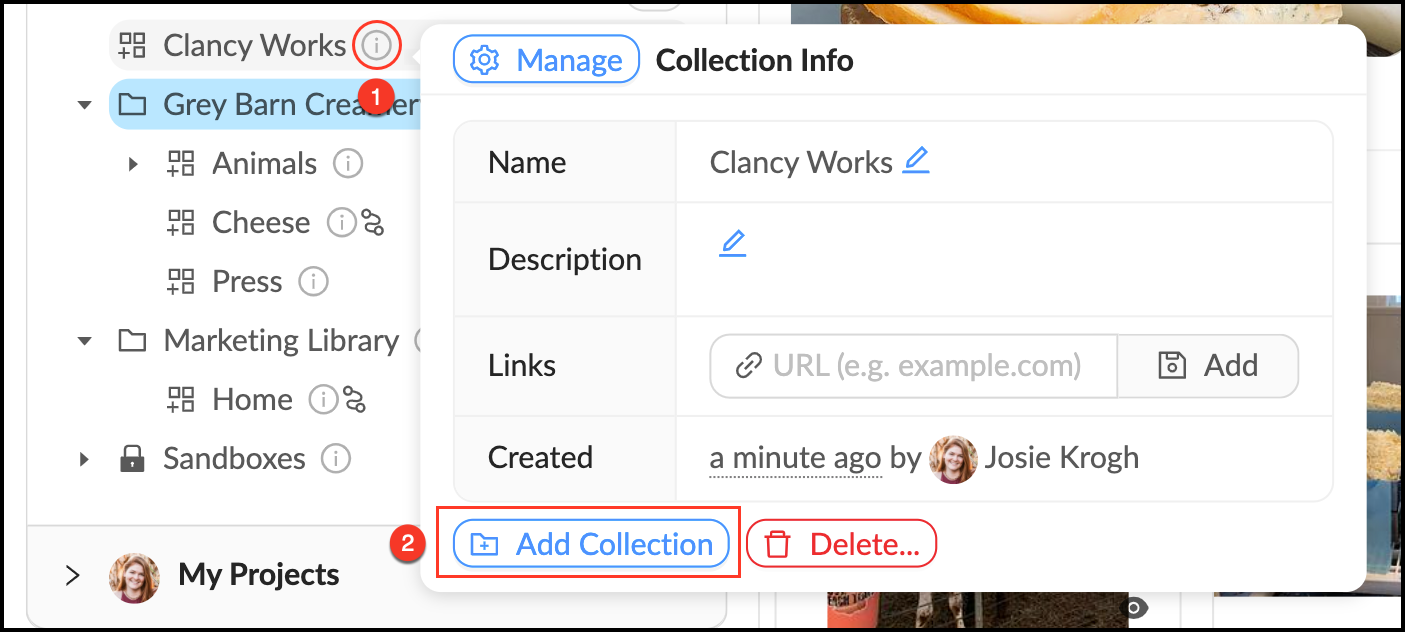
When you create a sub-Collection it will by default inherit all parent permissions.
- Mouse over the
 Info pop-over next to the desired Parent Collection.
 - Click "Add Collection".
- Give your collection a name and description.
- Click "Create".
Move an Existing Collection into a Collection Tree
When you drag an existing Collection into a new Organizer it will assume all permissions of the new parent container. Follow these steps to move Collections:
- Enter Rearrange Mode by clicking the
 pencil at the top of the Libraries panel.
 - Locate the Collection you want to move and drag it to its desired location.
- A blue line will appear to indicate where the Collection is being moved.
- Exit Rearrange Mode by clicking the
 pencil again.

The indented blue line indicates the Collection “Marketing” will become a Sub-collection under the Parent Collection “Cheese”. It will inherit the permissions from Grey Barn Creamery Library.