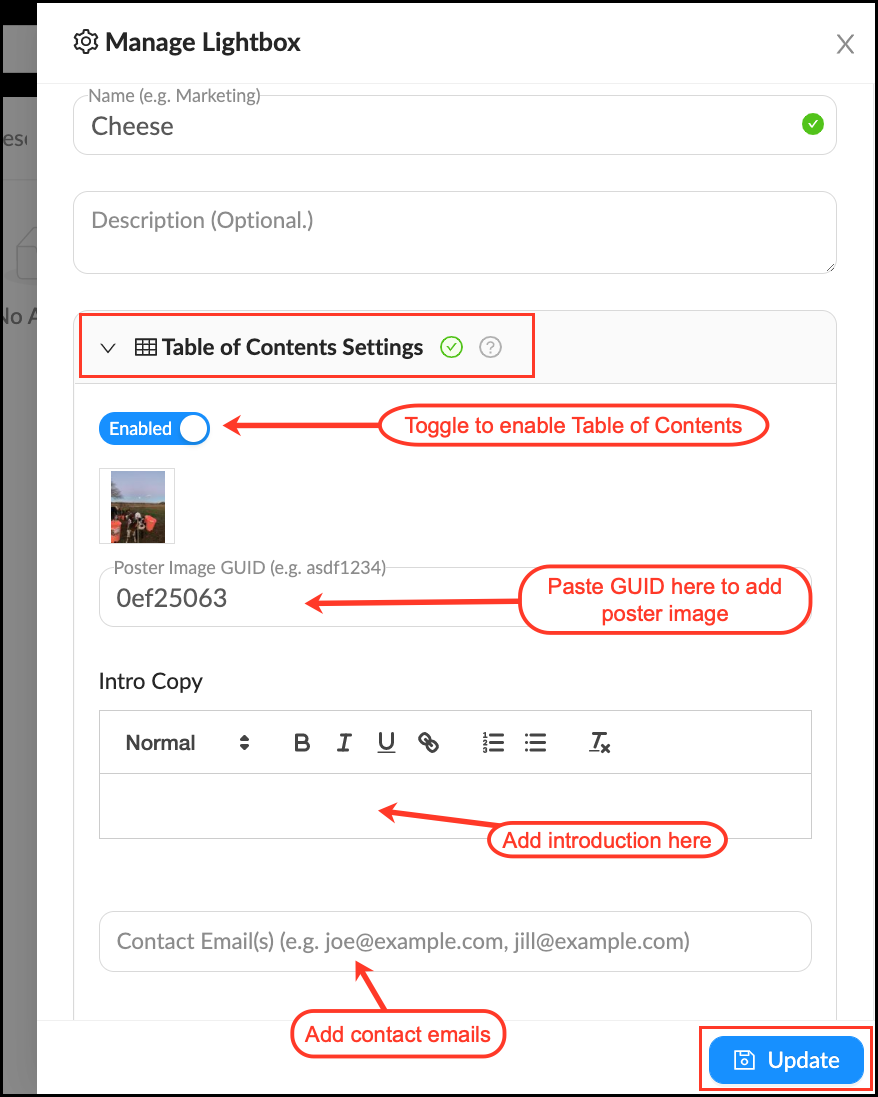
You may want to add a table of contents to your Lightbox or Project to provide more information and context to users. You can select a poster image, add a description and provide contact emails. We recommend adding a table of contents to Lightboxes you will be sharing, or collaborative Projects.
Add a table of contents to a Lightbox
- Mouse over the
 Info pop-over next to the Lightbox.
 - Click
 in the upper left corner of the Info pop-over.
 - Click the tab Table of Contents Settings.
- Switch the toggle to Enabled.
- Add a Poster Image, Introduction and Contact Emails to your Table of Contents.
- Click Update.
Once you’ve enabled the Table of Contents, follow these steps to add a Poster Image to your Lightbox.
Add a poster image
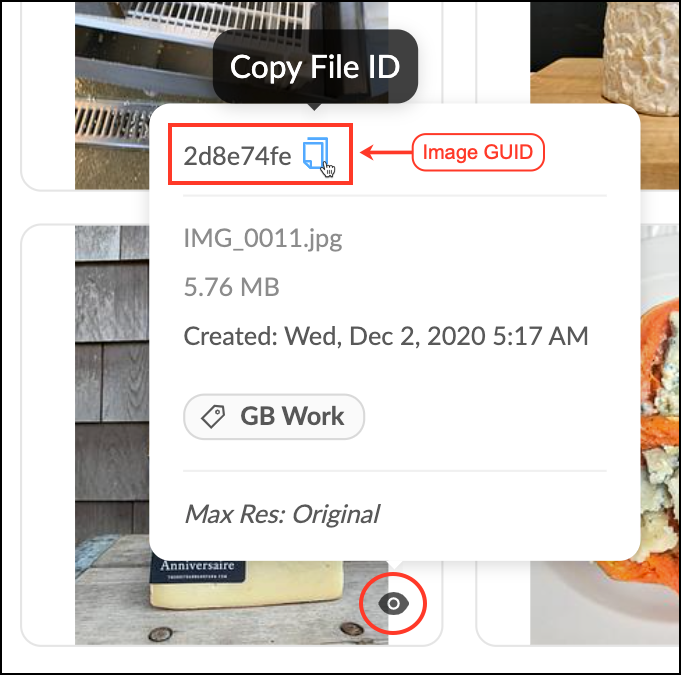
To add a poster image just copy and paste the desired image’s GUID (Globally Unique Identifier) into the poster image field in the Manage action menu.
- Locate the image you would like to be the poster image for your Lightbox.
- Mouse over the
 in the lower right corner of the image.
 - Click the
 in the upper left corner of the popup to copy the image GUID.
 - Go into the panel of the Lightbox. Click on the tab Table of Contents Settings.
- Paste the GUID into the poster image field.
- Click Update.
Tip: The poster image in a Table of Contents view is responsive to screen size. This means it will re-crop as you change to different size screens. We suggest you choose files that have a strong visual interest in the center of the frame, so that it looks good on multiple devices. Long horizontals, like panoramas, will frequently work best.